Developed by Laurie Hurson
This workshop walks participants through the steps for customizing their course Group on the CUNY Academic Commons. Explanations and activities walk the user through group areas and adding content.
Learning Goals
-
- Familiarity and use of the group areas
- Ability to add content and media to a group library
Introduction
The CUNY Academic Commons provides several options for hosting courses. By now, you have probably created a Commons account, determined you would like to build a group, and used the Commons Creation Portal to create your group. If you haven’t done any of those things, go through the “Getting Started” workshop and then circle back here.
To recap: Teaching with a group allows instructors to share course documents in the group library, host threaded discussions in the group forum, and send emails to all group members. Groups are less customizable than sites. You cannot change the way the group looks but you can add content, files, create docs, and engage in threaded discussions in the forum. Groups can be hidden, private to group members, or publicly visible and open to all members of the Commons. For more information on group privacy settings see here.
Groups forums facilitate emailing from the Commons. If a professor wants to email all students through the Commons, they will need to have thier students in a group to send the email. When a group member posts in the forum, it will be sent to all group members; many professors teaching with a linked-group site and ask students to join the group (and students are automatically added to the site). By connecting a group to a site via the “Group Site” functionality (in the creation portal), users can ensure that any posts made to the blog are distributed via email to members of the group. “Group Site” pairings can work well for classes where both public and private spaces are desired. Pairing a private group with a public site can allow faculty to make certain documents available only to members of the class, while also allowing members of the class to publish for a broader audience via the affiliated WordPress site.
If you created a group and want to connect to a site, or vice versa, a site and group can be connected in the group via Manage>Group Site.
The activities will walk you through the Group basics, pairing explanations with active steps you will take to build out your group. Many of these steps are also outlined in the documentation for Managing a Group and Teaching and Learning on the Commons.
Activities
As you work through this workshop, join our Commons Group to ask questions and get help. Post questions about building your group in the forum thread “Setting up a Course Group”.
Go to your Group
Once you have created your group, you can click a link to be taken directly to your new group. You can also find your group by clicking “Groups” in the main menu and viewing “my Groups” (if you are signed in). You can also click your avatar image in the upper right corner of any Commons page (when signed in) and navaite to My Groups there.
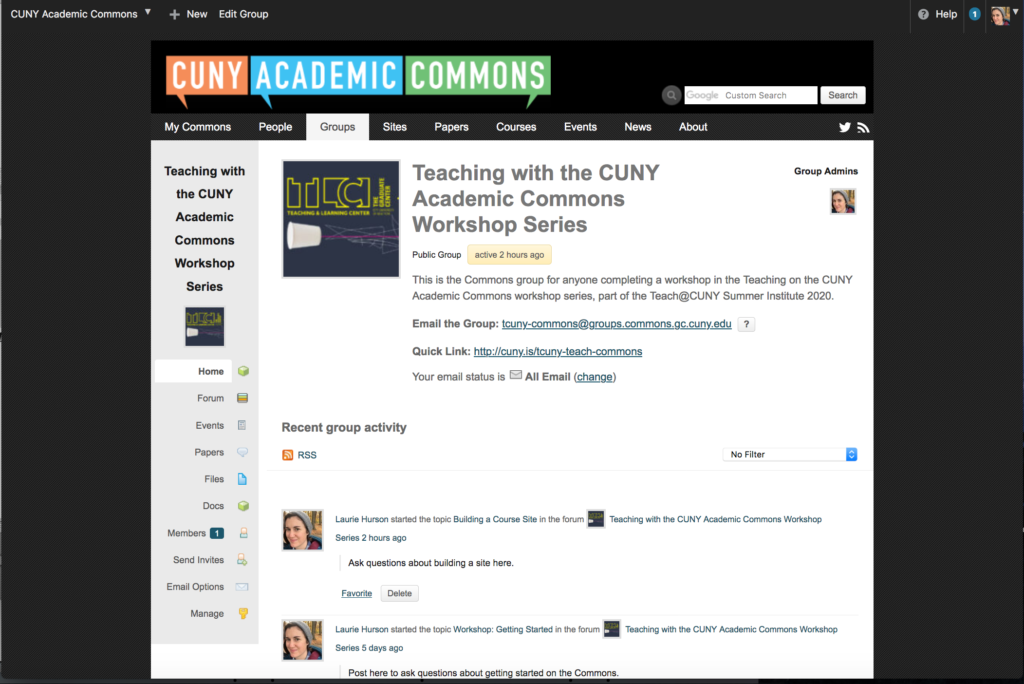
When you navigate to your group, you will land on the group home page, with the group image, title and quick links at the top. You can edit the group quick link and email in the group setting. All group activity will appear on the main Group “Home” page below the group information. This activity feed aggregates group forum posts, doc editing stats, files uploaded, and member information (joining, leaving, etc.). The gray menu on the left facilitates navigation to the various group areas.
-
- Home: group landing page and activity feed
- Forum: threaded discussion space (each entry sent to group members’ via email)
- Events: calendar to display group events (can be added by any group member)
- Site: direct link to a connected site (only present if you have a connected site)
- Library:store and organize various files for your course. Library contents can include: PDFs, Word, Excel, Powerpoint, external links (Google Docs, Zoom Meeting links), and more.
- Members: list of members in group
- Send Invites: invite new Commons user to group via username
- Email Options: each group member can customize email options
- Manage: group settings area; change member roles, accept group join requests, edit privacy settings, connect to site, and more
Explore the Group Areas
-
- Click into your “Forum”.Forum contains threaded discussion. Can you create a test thread? Professors often use the forum to host threaded discussion, much like the discussion board in Blackboard.
- Click into “Manage”. This is the administrative area of the group where you can change the group settings.
- You’ll notice there is an area for “Files” and for “Docs”. This will be changing in the near future where these two areas are collapsed into a single menu item called “Library”. For now, “Docs” contains editable documents created on the Commons. Any Group member can create and edit group “docs”. Word documents, media, pdfs, and other files created outside of the commons can be uploaded and stored in “Files”. Many professors use the files area to store and share course readings with students. You can create folders to organize files (i.e. Week 1 readings).
Set up your Course Group
To get your course group ready for class, complete the steps below.
-
- Upload Files: Add readings, syllabus, and other course materials to the “Files” section. Use folders to organize the materials
- Create Threads: Populate the forum with several threads for future threaded discussions. Students can respond to these threads on a weekly or reading-by-reading basis.
- Make your Course Group Unique: Change your group Title, Image, and description to clearly signal to students this is the group for your course. Choose an image students can associate with the course and add your name, campus, semester, and brief course information to the description.
- Determine your Privacy Settings: Look at the privacy setting for your Group in the Manage > Settings area. A hidden group will not be searchable so it is not recommended to use this setting for a teaching/course group. Public groups will allow students to join without your approval. If your group is private, students will request to join and you will need to accept before they are able to enter the group area.
- Invite Students: If you are planning to ask students to post in the forum, they will need to join the commons and join your group. Click “Send Invites” to send students an email to join the group. Make sure to include directions on how to join the Commons and how to join your group.
Takeaways
After completing this workshop, participants will have the ability to navigate the CUNY academic Commons Group functionalities and will have begun setting up thier course group. Attendees may want to consider also using a